Thursday, July 18, 2013

Happy Birthday, Crafty Creatives! with CCBox13

It seems like I was just writing last month's Crafty Creatives blog post yesterday and here we are with another! I am seriously behind on my making- busy is good but not when it cuts into my crafty time, growl! This month marks the 1st birthday of the subscription craft box, and to celebrate it, we got something definitely unique compared to what we've seen so far!


More after the jump!

Saturday, July 6, 2013

June in Review

Why is it that the first week of the month always gets away from me so quickly? I barely have time to adjust to it being a new month before it's all over, it seems! As it is, I debated posting my monthly goal page for June and decided not to as there are a few carry-over goals that will spoil some things I have to make this month! I'll post both June and July pages in August, and instead show you what I *did* get around to making and doing this month.


The big theme of June was getting ready for the opening of a new crafty shop local to me- Crafty Mums. I've been lucky enough to secure a shelf in this cute little shop and am hopeful for lots of sales and success! There are some great things in the shop and some great ladies crafting their butts off to fill it.


My shelf at the shop- the displays I had didn't quite work so I ended up making this one overnight! I have a good idea for a better display and I'm just looking for the right materials to make it with- I have almost all of it collected up and will give you guys an updated picture when it's done. 


And of course, I left you with a bit of a teaser of what was coming next- here's my completed Wimbledon necklace! These were really satisfying to complete as they had so much to them and ended up looking pretty much just how I wanted them to. 


Summer also means my fruit things come out again and I've made a few new things this year, plus adding some posts to my strawberries! The grapes were so much fun to make.


A new fruit that I'd hoped to have ready this month but couldn't quite get - dragonfruit! This slice pendant captured the spirit of the dragonfruit, but I am not quite happy with them yet. Maybe by next month I'll be posting some pieces I'm truly proud of, because I really love the look and colours of dragonfruit.


I also made a bunch of twisty marshmallow things and they've been a hit so far! Getting them smooth and 'perfect' was actually harder than it initially seemed it would be.


I also finally made some earrings and pendants with my spade canes from a few months back. I think they look quite cute. They're over at my sister shop, JustPlainAwesome.


And finally, not really a new item, but I made some bigger cookie pendants and they've convinced me to go even bigger. Little and dainty is good, but I think some big chunky pendants are in store, very soon.

It's always nice to look back on a month and feel like I got some things done and I'm glad I'm able to do that for June! I also was able to cross off some of my 2013 goals, and am going to be crossing off even more this weekend. I still have some catching up to do on my tutorials, so if you're eager to see any in specific let me know in the comments.

<3 S


Thursday, June 27, 2013

Crafty Creatives Box 12 and Thank You!

It would figure, that this month would be the one where the postie loses my parcel. It's definitely not the first time something's gone missing from my mail, but certainly the most frustrating! Finally, I have in my hands a replacement box from the lovely lovely gals at Crafty Creatives and I have a piece of what I was so lucky to be a part of!


I was pre-spoiled this month, making the cakes, but I only had 'pastel' and 'cake' to go on. I was excited to discover this even a month and a half ahead of time because one of my dream boxes is this one- The Treat Box!


Haven't taken this shot in a while... just a shot of how it looks when it's opened!


This card is one of my favourites and was one of the main reasons that I was disappointed my box got lost in the first place! It will probably be the first one I put up once I find frames that I like! The flamingo has a special place in my heart, as well.


One of my helpers, 'helping'. He had a lot to say about this box! He isn't much of a fan of lollipops but he has claimed them for his sister. We'll see about that!


Such a great assortment of beads and buttons in this box.


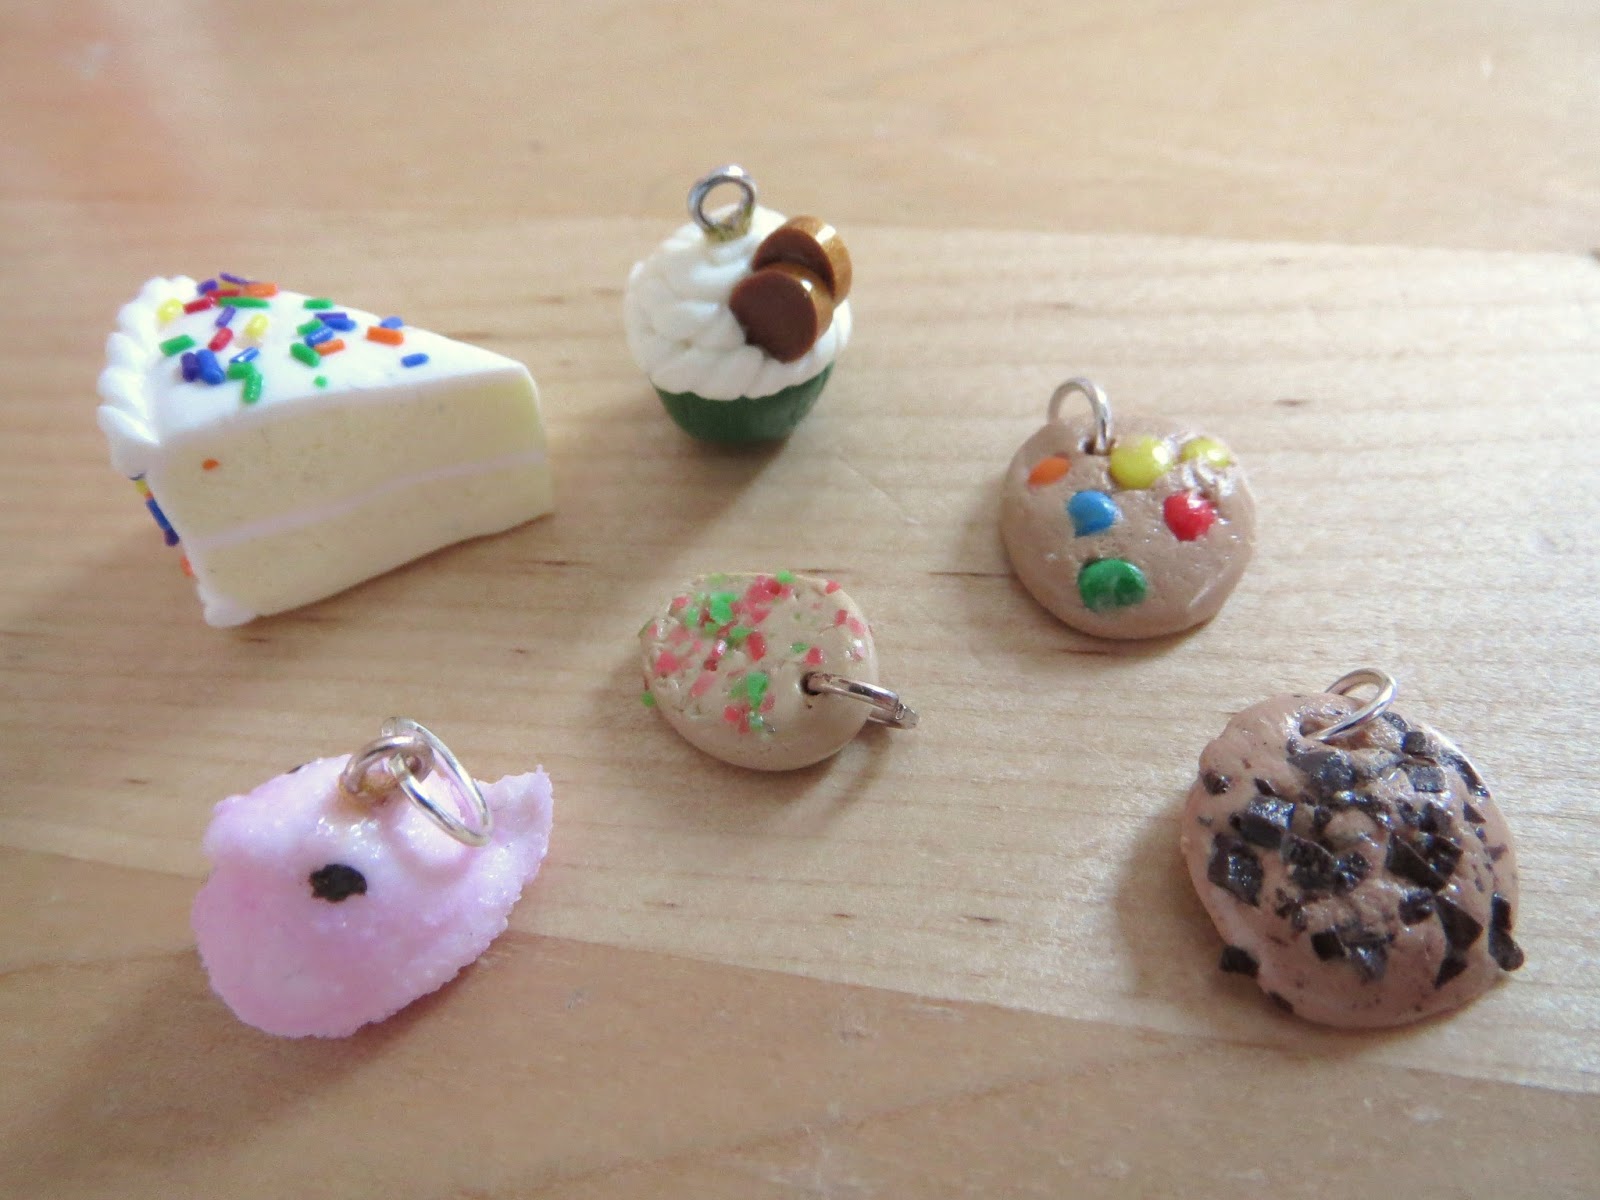
My charms, back home again! I rarely make things for myself so I'm tempted to just throw them back in my shop stash, but I will have to force myself to add them to something soon.


My daughter will be thrilled with the cookie cutter I ended up with! I loved Cathryn on the GBBO, so it's fun to have a recipe card featuring her own baking craftiness!


I think I mentioned on Twitter that one of my dream kits would be a cross-stitching kit, and here it is! With such great patterns, I'm not sure where to start! My mother cross-stitched a lot when I was small but I've never tried it, so I'm eager to start. 

Click to Enlarge!
As always, here is a run-down of the box's contents:
  • Art Card by Louise Williams - yum!
  • CC Kit- sweet cross stitch
  • 3 cake charms made by yours truly
  • Cupcake grosgrain ribbon 
  • 10 'm' print cabochons- I got the mix named '70s Ice Cream'!
  • Fat quarter of macaroon fabric- this is so beautiful and I'm planning on using it in my new display at the shop I'm renting a shelf from!
  • Pack of alteration tags from Stix2
  • Cookie Cutter- I got a butterfly!
  • Recipe card from Cathryn Dresser
  • Juicy beads
  • 2 double-sided craft papers
  • 5 ice cream buttons
  • 2 Chupa Chups lollies
Lastly I want to say thank you to not only Crafty Creatives for including me, but to all the wonderful things that my fellow CC bloggers have said about my charms! On the first day the boxes were landing, I was terrified! But, they have been well-recieved and then some. I'm really grateful for the feedback and the love of my little cakes! It made all the (literal) blood, sweat, and tears worth it! ;)

Thanks guys, you rock.
S


Wednesday, June 26, 2013

Polymer Clay techniques- using baked clay for embellishment

Most of my polymer clay techniques are self-taught and self-discovered. One that I picked up when wanting to make coloured sugar for Christmas cookies, two years ago, was to use already-baked translucent clay to make that sugar. From there, the ideas came quickly.


Here is the amount of baked clay 'ingredients' (plus a couple others) I've accumulated from just a year and a half or so of using it as an ingredient. It adds up!


'Peep sugar' and chocolate/toffee chips are made in very different ways. I have a grater that I only use for polymer clay that I use to grate down the baked clay to almost a dust for things like peeps, and for chips I simply slice and then chop down to the desired chip size. 


I've also gone the baked route for other ornamentation- with the M&M cookies, I actually worked the baked sweets into the clay to get a more realistic look when they were finished. The brown 'sticks' are to be Flakes, which I've had made for a time now but have yet to tackle the Flake texture... but I'll get there. Hearts and coins decorated cakes and cupcakes and were my first cane-sliced decorations!


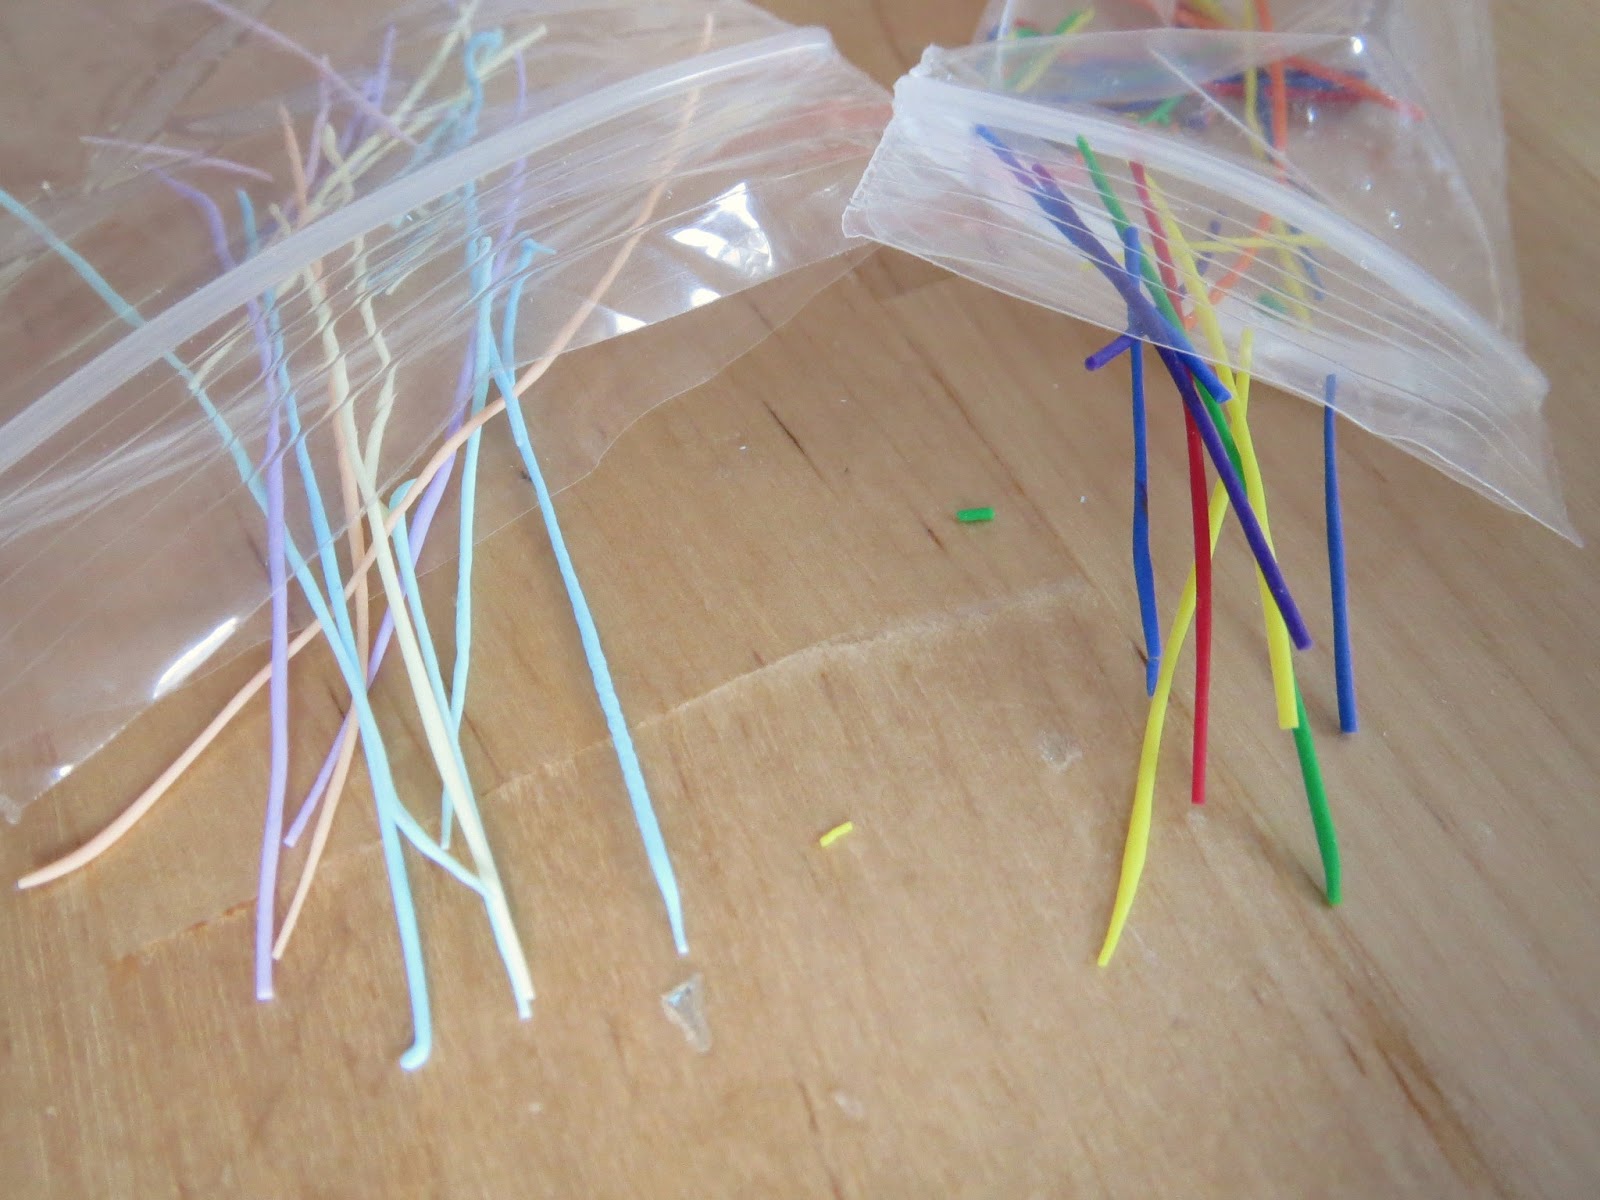
My most recent baked clay technique has been to pre-make sprinkles. My donuts have in the past had every single sprinkle made individually- while I think it looks great, it does take time. So here I have some pastel and normal multi-coloured strings of clay which I chop down to sprinkles as I need them, ready for donut testing. So far I've used these to make some cakes for a customer and they looked great.


I've also used a few other things for embellishment- the fake sugar and ice is a glass product and works much better than using translucent clay for the same purpose. It makes great 'salt' on my pretzels! And of course, watch parts are used quite frequently in polymer clay work nowadays, and mine is no exception.


There are many other baked-clay methods I've used that I've not had space to mention. Not all are applied in the same way, but the best way to find something that works for you is to experiment. There are great little tricks hiding out there, waiting to be discovered! 

I can vouch for how these methods work for me, but they may not be accepted as the best or 'correct' ways to use polymer clay across the community! But, as always, do what you find works best for you and creates a great design.

 <3 S


Thursday, June 13, 2013

My CC12 contribution- Behind the scenes plus a CC Giveaway!

I don't have my Crafty Creatives box yet this month, but I am itching to talk about it. Consider this your warning that this entry is a pretty big spoiler for one of the items and a hint at the general theme of the box! So here's a few photos, some general chatter, and a GIVEAWAY!


This is what kept me so busy in May- these little cake slice charms! I am so lucky that the gals over at CC let me be a part of their 12th box. I suppose after months of spoiling myself on the box themes/contents, I was basically pre-spoiling myself yet again, but that was worth it. (For the record, as of right now I haven't fully spoiled myself on the contents though I've seen a couple of things on another blog post... trying to be SLIGHTLY good, anyway!)

Cake slices are one of the charms that got me started and I did a tutorial a few months ago on how I make them. Let's just say that after the marathon session of cake-slice making I've refined those methods QUITE a lot, ha!


One of my clay orders- I ended up using Fimo Effect pastels, the colours were perfect for the brief and it cut down on my production time so much. I'm lucky these were launched recently or I would have spent SO much time blending! My husband was quickly drafted for conditioning the clay, and we made quite a team, even if he never graduated to any other clay jobs.


One of the casualties- the toothbrush I used to texture the cakes. First the handle broke, and I learned to love it as just the top, but then it split in half too. Luckily I had plenty more of these complimentary airline brushes, though using a new one with the handle was harder after so much time with this little friend. I'm sad, right?


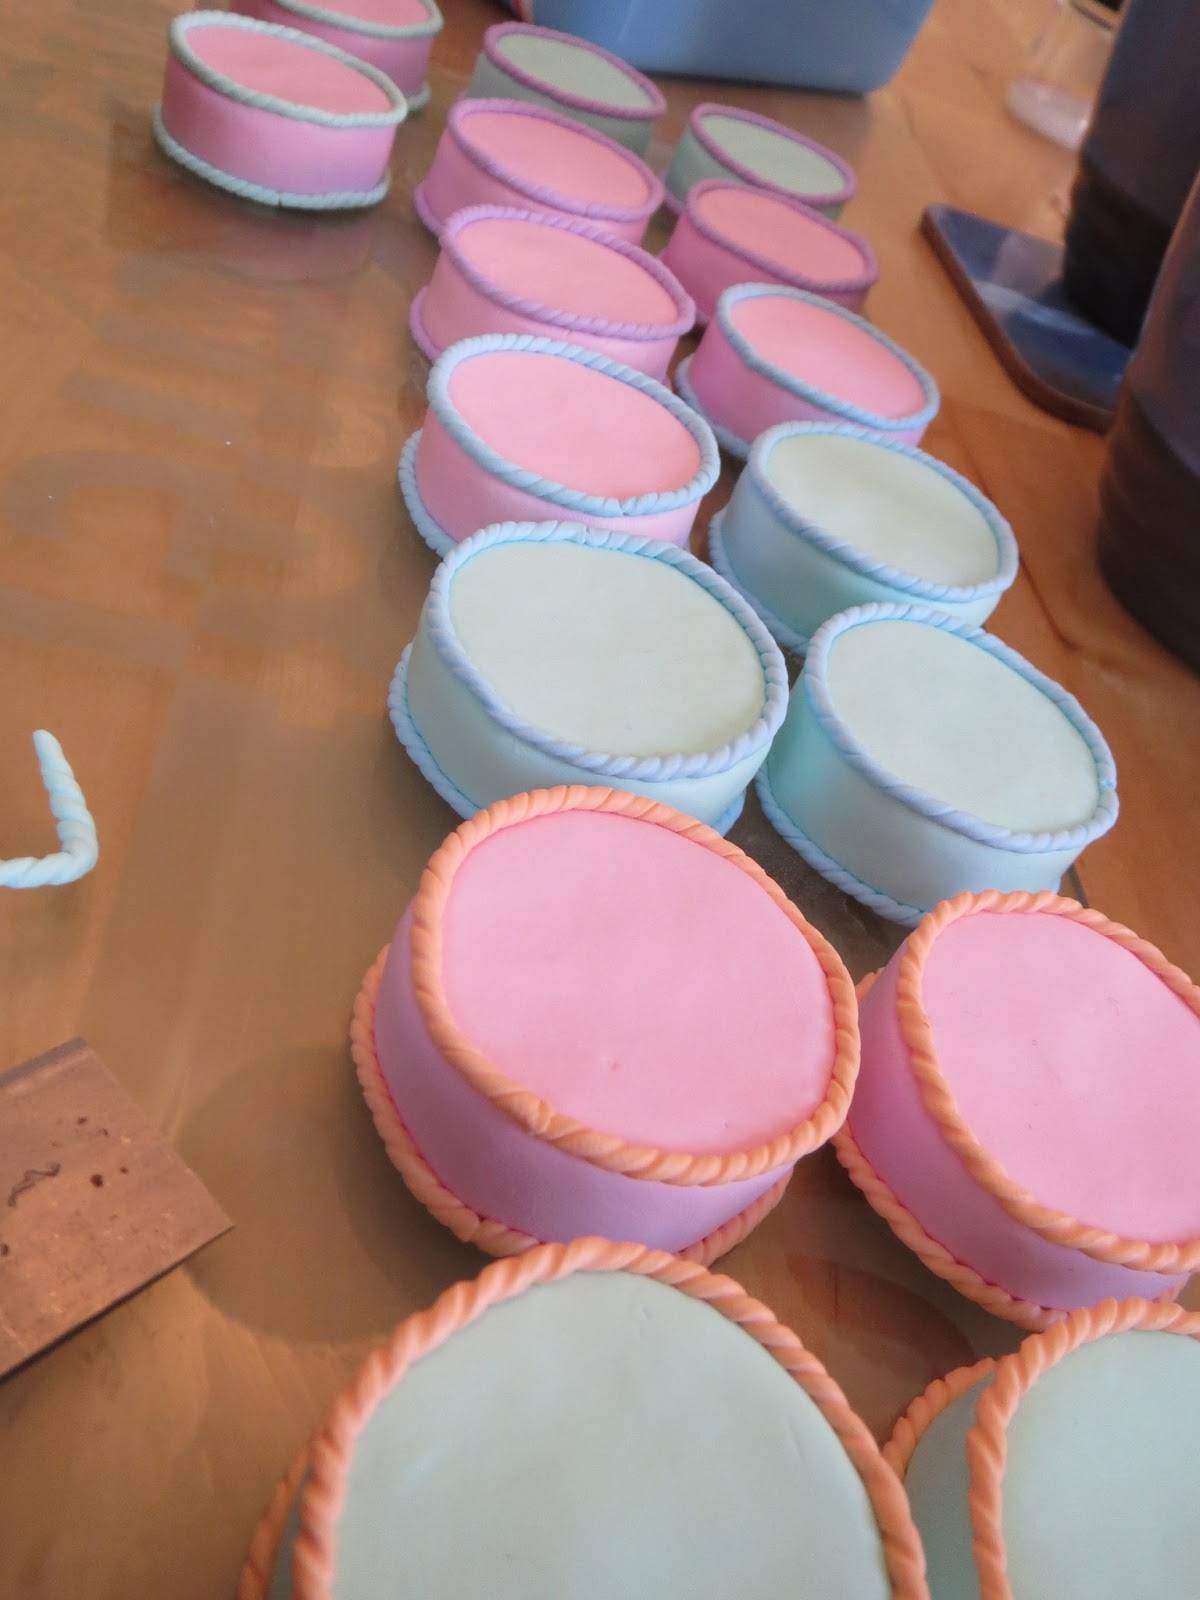
Making lots of cakes at once. This day was a bit crazy- I did two 'batches' in one go and for some reason it took me so much longer that way. I like the colours all lined up here and the 'school' of cake-fish as my husband referred to them.


But this part was satisfying once they were ready to be baked!


This is a good look at the varnishing part of it all which my husband took charge of, he was the second casualty courtesy of a sharp metal scrap used to create the cake-forest for varnish drying. A noble sacrifice.


Here are all the colour combos- I ended up needing to make an uneven number and it was SO HARD to choose which 'combos' I liked best for the extra cakes. I'm eager to see which ones I get in my box when the postie finally hands it over!


Goodbye little cakes. Even though I knew exactly how many I was making, I still counted them multiple times, put them in bags of equal number, and then dreamed about finding extras hiding in containers that I hadn't sent. It was an adventure and I'm so glad I did it- I didn't think I could for a while, but it got there and I'm pretty amazed that it happened. The Crafty Creatives gals are great to work with!

And as a further awesome move on their part, Crafty Creatives is sponsoring a giveaway, right here! There are three CCBox12s up for grabs, and all you have to do is 'like' our Facebook pages and then use the widget below to enter. You can enter up to four times daily!


Thanks again to Claire and Isobel at Crafty Creatives for letting me be a part of something that has really sparked my imagination over the past 10 months or so. We are all lucky to have such a great little box land on our doorsteps every month!

Monday, June 10, 2013

Polymer Clay Tutorial- Orange fruit charm

I know I'm behind on my tutorials for this blog, so this is the first of many catch-up tutorials to come this summer! I'm going back to easy but effective charms with this cute little orange.


More after the jump-

Thursday, June 6, 2013

May in Review

May was another crazy 2013 month, but this time mostly in a great way. I can't believe we're almost a week into June already! Most of my month was taken up by things that I can't yet talk about- but I will be talking about it this time next week! I thought I'd go ahead and round up the rest of my month's accomplishments in a separate entry before then though, so here's what I got up to in May!